WE’VE MOVED!
Check out this post and other crafty inspiration over at our new blog!
Happy Friday! Today we just have a real quick and easy project, a handmade felt envelope to hold a special note for your Valentine ❤ Awww, how sweet. I promise it’s super easy and can be done with or without a sewing machine. Let’s take a look…
Scissors Velcro Hot glue gun (I prefer low temp!) Red and white felt (or desired colors) Sewing machine (OR needle & thread)
Once you have your supplies gathered, follow these simple step-by-step directions:
-
Cut your red felt sheet in half, long-ways. I like to fold mine in the middle and then use the fold for a guide to cut straight.
-
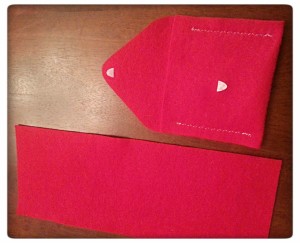
Fold your felt into thirds, such as you would a letter to place in an envelope. I just used my best judgment by sight. Also, if you already have a special gift in mind, go ahead and size it for a guide on how large to make your pocket.
- Once you have your pocket size, thread it with a few sewing pins to keep it in place. This is where you break out your sewing machine.
- Make sure your machine is threaded with your desired thread color. Adjust your settings as desired, I used a zigzag line.
- Again, use your judgment for where to sew your line. I left plenty of room on each side, and at the top and bottoms. Once sewn, tie off your ends, as usual.
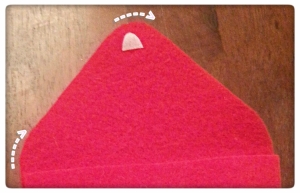
- To cut the top fold of the envelope, fold your felt envelope again, long-ways, with your pocket facing out (this way, each side will be even). Start with a slightly rounded side piece, move in towards the middle at an angle, then round off the tip.
-
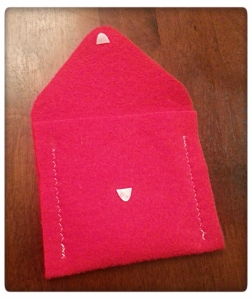
Now, apply your Velcro (usually self-adhesive; if not, hot glue works well). I prefer to leave the pieces attached to one another, place one side on the tip of the envelope, then fold it closed. This will show you where you want the other half to stick.
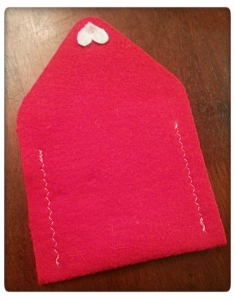
- The white felt heart was cut freehanded. Just remember to fold your felt in half and cut on the fold (like we did with the envelope), this makes each side even. The heart is attached with hot glue.
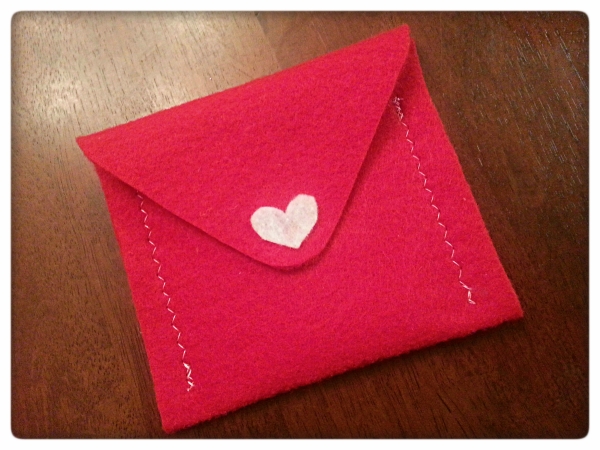
So, here is our finished project:
Obviously, only using half a sheet of felt, this little envelope is rather small. Feel free to experiment with larger envelopes, felt is available by the yard in the fabric area of your local craft store! Can you think of all the neat surprises you can hide in this little cutie? Love notes… candies… spiders (eek!). Okay, leave out the spiders, but these envelopes can be used anytime! Write love notes to your kids and stick it in their lunch box. Leave a message from the Tooth Fairy next time your child looses a tooth!
What great ideas do you have?
We’d love for you to share with us sometime! Hit us up on Facebook, email, or send us your favorite project on Pinterest! Want a tutorial? We can’t really guarantee anything (lol) but we will try!
Thanks for stopping by again today. If you haven’t already, hop on over to BlogLovin’ and add us to your blog list! If you don’t use BlogLovin’, it’s never too late to start! I discovered this wonderful website a few days ago and now use it for all the blogs I follow! It’s great, so check it out! Stay tuned for even more fun projects (and maybe a give-a-way or two!) coming soon!
Tagged: DIY, Envelope, Felt, Valentine, Valentine's Day






I love this…my girls would be able to do it too. Really gorgeous and fab idea!
Yes, this would absolutely make a great group project! And, you can share the Sweethearts with each other, too, lol!
Visiting from Do Tell Tuesday – thank you for the lovely tutorial 🙂
Thanks, Jackie! Glad you could stop by!
It’s a great project with a beautiful result!!
I just love it 🙂
Thanks! We appreciate you taking the time to comment.
This is so sweet and I just love the stitching :o)
Have a great week!
croppedstories@gmail.com
Thanks for stopping by.
how fun! You could do so much with this… really cute. Thanks for linking up to Create Link Inspire! Emily@nap-timecreations.com
Thanks, Emily! The glass blocks do have endless possibilities!
so sweet and simple to do
as a little something special
for my Valentine
would love for you to share
at Fridays Unfolded this week!
Alison
Nancherrow
Thanks, Alison! We’ll hop on over!
brilliant idea, love it, have some ideas that I could use this on. Thanks for sharing at Snickerdoodle Sunday!
Thanks for stopping by!
Very cute!
Thanks for linking up to this week’s Catch a Glimpse Party. I’ll be featuring this tomorrow. 🙂
Thanks, Allison! We’ll be sure to stop by and check it out!
Cute. I have made them before and stitched my kids’ names on them. Thanks for linking to WWDParty!
What a wonderful idea! Thanks for sharing!
These are absolutely adorable and could be used for gift cards. Thank you for linking up and sharing it with us at #WWDParty. Have a wonderful weekend!
Thank you, so glad you could stop by!
[…] 9. DIY Felt Valentine Envelope […]
Great tutorial! It turned out so cute! Thanks for linking up with us at the Create Link Inspire party! You were featured today!! http://www.marvelousmommy.com/2014/02/10-valentines-day-diy-projects/
Awesome! We sure appreciate the feature and for you to stop by for a visit!
How neat! And so easy! Thanks for linking it up to the Thursday S.T.Y.L.E. Link Party! I think I may do this as gift card holders for Christmas!
What a great idea! Thanks for stopping by, too!
I love these, and easy too! Very nice job, thanks for sharing.
Thanks, Sarah, so glad you could stop by!
This is so neat! As someone else commented, these would also be great for Christmas gift card holders!!! Thanks for sharing and for linking up with us at the Weekend Wind-Down Party, hope to see you again next weekend! God Bless!
Thanks a bunch for paying us a visit! See you next week for sure!
This is too cute! Thanks so much for linking up at Thursday STYLE! Adorable 🙂
Thanks, Angela! So glad you could pop in for a visit!
[…] Diy Valentine – My Paper Craze […]
[…] Diy Valentine from My Paper Craze […]