WE’VE MOVED!
Check out this post and other crafty inspiration over at our new blog!
www.mypapercraze.com
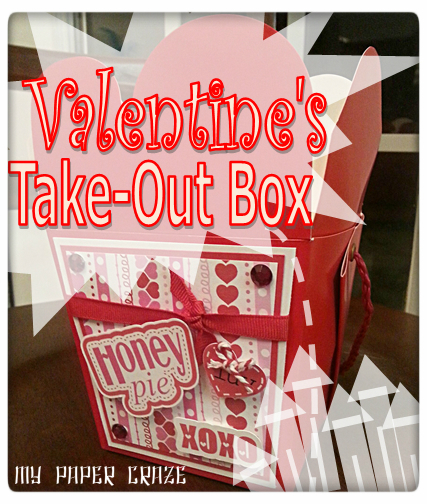
Good Morning and welcome back to our crafty little blog! Today we bring you another simple little Valentine’s Day craft… decorating a Chinese-style take-out box {YAY}! I absolutely adore these boxes and all their different sizes, they are just so darn cute!
This project is pretty self-explanatory, but I’ll give you the short and sweet of it all… think of this as a 3D card, if you will:
- 1 Chinese-style take-out box (or any box you wish to decorate)
- Themed patterned paper (I used hearts for Valentine’s Day)
- Coordinating cardstock (to match your paper)
- 3D pop-up adhesive squares, if desired
- Adhesive glue, such as for scrapbooking or card making
- Embellishments, such as matching ribbon, baker’s twine and rhinestones
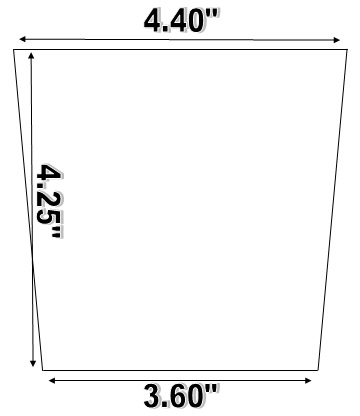
{measure your box}

First thing is first, measure your box. This will give you the size of the area you have to work with. As you can see below, the top is slightly larger than the bottom, so your sides will be at an angle. You have two choices: cut manually OR set this image up in your Silhouette Studio software (my choice!).
{set up your work area}
So whether you choose to freehand the shape with your paper-cutter or set it up in the Silhouette Studio software, this is what you are looking for:
You’ll notice that this is the exact size of the front of your box. The reason for doing this is that you can now use it as a template for designing the rest of your “pieces”. I highly suggest cutting this {FIRST} and aligning it with your box to ensure your cuts are angles are correct. If not, you might be disappointed when the project is finished and does not sit well on your take-out box.
{decorate!}
From here on out, you’ll decorate this as you would a handmade card. You can use your Silhouette Studio (as I did) and do print-and-cut pieces for your sayings, OR you can use your stamp collection if you have one. Not sure how to use your stamps to make your own die cuts? Check out our long-ago post on Fussy Cutting Making You Fussy?

Don’t forget your layered pieces of cardstock, they really add a nice border to your patterned paper. I cut my first layer (white) 0.25″ smaller than my box to have a nice red layer showing on my box. From then, I only cut the red 0.125″ smaller than the white, and the paper 0.125″ smaller than the red. I think it turned out nice.
Once you have all your little pieces, go ahead and arrange them as you wish on your patterned paper to make sure it all fits and looks the way you intended.
Here is the order you want to apply your designs:
- Layer your cardstock and patterned paper (I prefer tape scrapbook adhesive for no drying time)
- Tie coordinating ribbon, if needed
- Attach the sentiments with 3D adhesive squares for that little “pop”
- Apply any finishing embellishments, such as the rhinestones or baker’s twine
- Glue your “finished” piece onto your take-out box with a strong adhesive (I also like hot glue, but watch your fingers!) Make sure you open the top of the box and use your hand on the inside for extra pressure to get a good “stick”
Now, for the fun part…

I think this is a super idea for kids, but really who doesn’t love treat boxes? With the wide variety of boxes available, you can get different colored boxes and decorate them all year long! What goodies would you put (OR want to receive) inside a cute little box? Valentine’s cookies or chocolates, maybe? You can go crazy with them and give them out to your co-workers! Valentine’s Day is on a Friday this year!
Thanks for joining us again today, we hope you liked our fun little tutorial. See you again soon for {MORE} Valentine’s fun right around the corner! ❤