Category Archives: Burlap

Hearts-A-Lot Burlap Pillow Cover

WE’VE MOVED!WE'RE MOVING!

Check out this post and other crafty inspiration over at our new blog!

www.mypapercraze.com


500x200button (1)

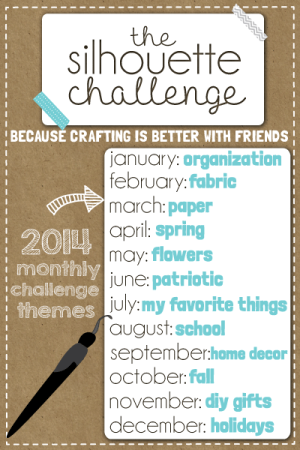
Good Morning and welcome back!  We’re very excited to bring you another round of projects from our bloggy buddies with the Silhouette Challenge Group!  Today’s theme is {FABRIC}!  Don’t worry if you’re not a professional seamstress, I can bearly thread my own machine {LOL}.

For our project, we chose to do a {HEART} themed burlap pillow cover and it turned out amazing!  It’s been the perfect addition to our Valentine’s décor and it was super easy to make!

20140120_172443_resized_1

Before we dive into the tutorial, be sure to stop in and check out all the other wonderful projects today, you are sure to find some crafty inspiration!

Silhouettechallengecollage

No-Sew Valentine’s Day Pillows by A Tossed Salad Life

  1. No-Sew Valentine’s Day Pillows by A Tossed Salad Life
  2. No-Sew Interchangeable Fabric Bunting by unOriginal Mom
  3. Monogrammed Burlap Garden Flag by The Turquoise Home
  4. Crawl, Walk, Bike by It’s Always Craft Time
  5. Freezer Paper Stenciled Tote Bags by Weekend Craft
  6. DIY Bleach Spray Shirt by Practically Functional
  7. Stenciling Sherlock by Please Excuse My Craftermath…
  8. Felt Star Wands by Cutesy Crafts
  9. Yoda Kid’s T-Shirt by Architecture of a Mom
  10. Mark Your Territory- Dog Flags by Black and White Obsession
  11. Nautical Pillows by Lil’ Mrs. Tori
  12. Big Sister Gift & Silhouette Cut File by Creative Ramblings
  13. Nerdy Baby Onesies + Free Cut File by Essentially Eclectic
  14. Easy Easter Bunny Onesie – Silhouette Cameo Craft by Adventures in All Things Food & Family
  15. Fabric Envelopes for LEARNING LETTERS! (& cut file) by From Wine to Whine
  16. “Good Morning, Sunshine!” Memo Board by Tried & True
  17. Hearts-A-Lot Burlap Pillow Cover by My Paper Craze <—you are here
  18. Baby Quilt by Dragonfly & Lily Pads
  19. Surprise Holiday Banner by Whats Next Ma
  20. “Team Betty” Tote Bag by The Thinking Closet
  21. DIY Sock Minion by Create it. Go!
  22. Pretty Up Some Organza Bags by Getsilvered
  23. Easy Heart Appliqued Onsies by Create & Babble
  24. Bleach Pen Gel & Freezer Paper Stencils Made with the Silhouette Machine by Bringing Creativity 2 Life
  25. Valentines Baby Onesie & Boy’s Shirt + Free Cut Files by The Frill of Life
  26. Valentine’s OWL Always Love You T-shirt by My Favorite Finds
  27. DIY Screen Printed Curtains by Chicken Scratch NY
  28. Fabric Painted Quilted Wall Hanging by Terri Johnson Creates
  29. Glitter Iron-On Top by Simply Kelly Designs
  30. DIY Monogrammed T-shirts with Silhouette Heat Transfer Material by Pitter and Glink
  31. Birthday Challenge by Fadville
  32. Machine Applique with SIlhouette Cameo by The Sensory Emporium
  33. Fabric Applique Valentine’s Day T-Shirt by DailyDwelling
  34. “Cute as Cupid” shirt by crafts, cakes, and cats
  35. Sew Cute Applique by Life After Laundry
  36. Rhino Onesie by It Happens in a Blink
  37. Upcycled Birchbox Cameo Accesory Organizer by Cupcakes&Crowbars
  38. Customizing textiles with Heat Transfer Vinyl (working title) by feto soap
  39. Easy Fabric Art by McCall Manor
  40. Lady Bug Tote Bag with Silhouette Rhinestones by Ginger Snap Crafts
  41. Mommy and Em’s Coordinated Aprons by TitiCrafty
  42. Canvas sketch project and a share by Clever Someday
  43. Foxy Lady Pajamas by Mabey She Made It
  44. Teddy Bear by Work in Progress


tutorial

So first, you will need the following supplies:

  • Burlap fabric – one yard should be plenty for a small pillow, but be sure to measure you pillow in advance
  • One pillow – I recycled one that I had on hand from a prior decorating experience {be aware the patterns may show through the burlap}
  • Scissors
  • Sewing machine {or needle and thread}
  • Heat transfer vinyl* – I used white for the heart pattern
  • Cardstock or vinyl* – this is for the red heart stencil
  • Fabric paint – I used red for the middle heart

*Don’t have a Silhouette?  That’s fine!  Cut you some heart stencils and use different colored fabric paint to create your own masterpiece!

collage2

  1. Layout the burlap fabric and “measure” your length by tri-folding it over the pillow.  These are designed to mimic pillow shams, so be sure to leave an overlap “flap” for the back.  The length of the sides are unimportant at this step, as long as the sides are covered.  If needed, go ahead and mark where your sides will be.
  2. After you’ve “measured” {I used my eyeballs}, sew a straight line through your tri-folded material.  Be sure to leave enough room for your pillow to fit inside!
  3. Trim the sides along the outside of the sew line (don’t worry about how it looks, this will be on the inside.  Turn your pillow cover inside out {or technically right-side-in? lol}
  4. Cut your heat transfer vinyl and lay it out on your burlap for positioning.  As you can see, I also laid out a red heart (taken from the center of my stencil) to visualize the finished layout.  Once satisfied, remove the stencil red heart and follow your heat transfer instructions to adhere the white hearts to the burlap.
  5. Replace the red heart cutout to it’s desired location.  Fit the stencil around the heart and remove the center.  This ensures that the stencil is placed correctly on the burlap BEFORE you paint.  After placing a sheet of cardstock {or other barrier} between your layers of burlap, dab your fabric paint within your stencil to create the red heart.  The barrier is important to prevent having a duplicate heart on the back {lol}.
  6. Allow the fabric paint to dry and… Congratulations, your pillow case is completed!  Just slip your pillow inside and enjoy!

Just imagine all the applications this process has!  Now you can spruce up those frumpy old pillows in your living room and coordinate pillow covers for each holiday!  How exciting!  Make fleece pillow covers for the kids {or yourself!}?  Make weather-resistant pillows for your deck or patio?

So what do you think?  We’d love to have your feedback!  Be sure to hop on down and leave us a comment or hit us up on Facebook!

{CUTE} Burlap Memory Jar!

WE’VE MOVED!WE'RE MOVING!

Check out this post and other crafty inspiration over at our new blog!

www.mypapercraze.com


Good Morning and Happy {SHORT} week to everyone who enjoyed the holiday yesterday!  Today, let’s take a walk down memory lane together…

Burlap Memory Jar

When you get to be my age (we’ll just say I’m 29… again, lol), long ago memories seem to slip through the cracks.  Oh sure, I remember taking the kids to Disney World, the first ballet recital, the first home run.  But think about all the everyday moments we take for granted…  the twinkle in their eyes and the excitement in their voice telling you about their first day of school…  how they had lettuce, meat, and some kind of shell for lunch and realizing they’ve never seen a taco before (!)…  talking to them about being old and they pat you on the arm and innocently look up at you and say, “You’re not old, you just look old”…  And you think to yourself how you’ll never forget this moment.  {SIGH}

Then as time goes by, one by one, those cherished memories fade away.  I tell my daughter this all the time, to write down these moments, but I don’t think she really believes me, lol.  When I saw memory jars popping up on different blogs and Pinterest, I knew this was the answer for me!  Not only to open it up and read them once a year, but to document all those memories that I know will be lost.  Thankfully, I have four grandchildren so I get a second chance to preserve these memories that with all the hustle and bustle of raising my children, I didn’t think to do.

photo-1

I kept my jar simple, decorating it just enough to sit on the kitchen island, which keeps it easily accessible.  I have my pen and small slips of paper handy!  After I’ve documented all those little moments, I’ll simple roll my papers up and place them in my jar to be relived over and over and over.  Can’t you just see me smiling with fond memories?

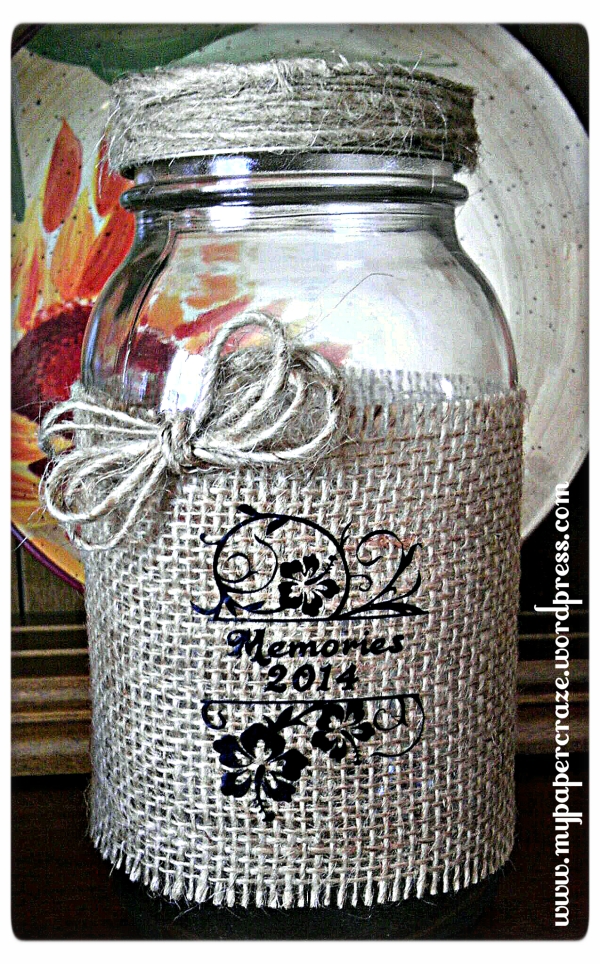
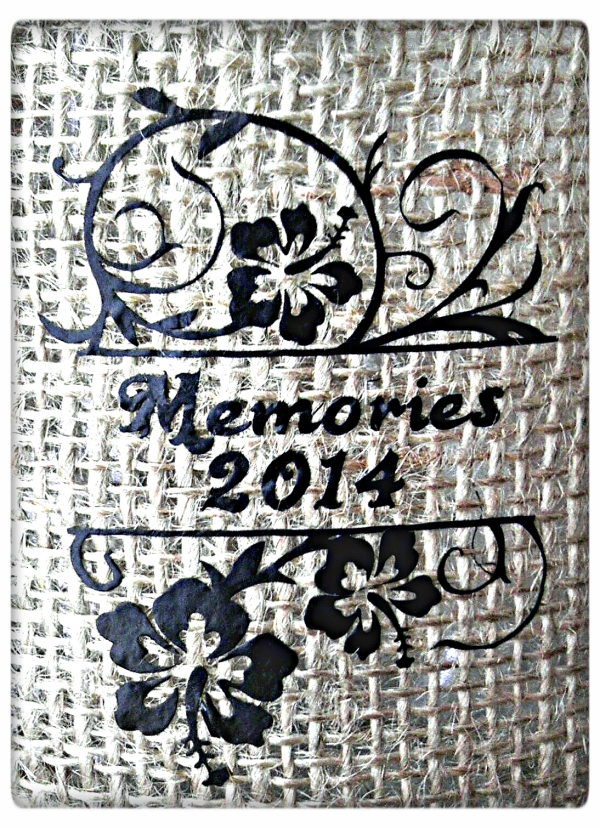
For my jar, I used black iron-on vinyl to cut my design on my Silhouette and ironed it onto a scrap piece of burlap.  I was actually surprised that this intricate cut adhered so well.  I hot glued the burlap around the center of my mason jar, wrapped jute twine around the ring and added a little bow just for fun.

photo-2

I hope all you Mothers and Grandmothers are finding a way to help preserve your precious memories.  A memory jar might not work for you, but be sure and find what does.  I promise, you’ll be so thankful you did… when you don’t just “look old”, you are old (LOL)!

Can you think of other uses for a Memory Jar?  How about Scrapbook journaling!  Be sure to share your project inspiration with us, we’d love to have your feedback!

Thanks for joining us again for this simple, but cute project today!  Be sure to check back later in the week for some inspiration for the upcoming Valentine’s Day!

“Another” Wreath… Santa Style!

WE’VE MOVED!WE'RE MOVING!

Check out this post and other crafty inspiration over at our new blog!

www.mypapercraze.com


Good Morning and Happy Tuesday!  Hope everyone got a chance to check out our fabulous Christmas tools!  What?  You didn’t?  That’s okay, there is plenty of time before Christmas to seek in a few cheerful messages (just check out Messages from Santa! — it’s worth the look!).  But back to today’s projects… that’s right, got two of them here for you!  If you’ve followed my blog for more than a few days, I’m sure you’ve seen by now that I love wreaths!  I feel like I have so many doors and so little time!  But wreaths are so much more than that, right?  Well, maybe not, but here are two more that can be more than just door hangers!

First, check out this festive little thing… can you see what it is?  That’s right, it’s a card holder! 

20131217_092628_resized

Now I’ll admit that this probably wouldn’t hold all the cards I have received at home, but it’s perfect for work!  So these are the cards all my lovely coworkers have sent to our department… cute!  My favorite part was how easy it was!  We wrapped a styrafoam wreath form in red chevron floral ribbon, slapped some paint on the clothes pins (fortunately, we had these left over from last year!), glued it all together with some hot glue and tied the pretty little bow.  Here’s a few close-ups. 

 20131217_094849_resized

20131217_094909_resized

20131217_092614_resized

Then, check out this second wreath… it’s my new favorite (but don’t tell the other wreaths I said that!).

 20131214_200855_resized

20131214_200921_resized

20131214_200903_resized

Oh, isn’t it just perfect?  Well, I’m not sure that any craft is perfect, LOL, but I could just stare at this one all day long.  It helps that I’m fascinated with burlap AND this is my first burlap wreath.  And again, can you say easy?  I watched a few videos on YouTube (my favorite resource) and BAM, call it done.  For the burlap, I used 3 yards or red burlap fabric and cut it into 4 even strips of “ribbon”.  If you can find real burlap ribbon in your color choice, that might be better, but it wasn’t too hard.  I didn’t have to measure or any of the hard stuff, just folded and cut, folded and cut.  For the wreath, it doesn’t have to be perfectly even, just the best you can do.  The form is just a standard metal wreath form and the belt is made from black grosgrain ribbon with a silver glitter cardstock buckle!  You don’t even need any pipe cleaners or wire, the burlap holds itself in place!  I love, love, love it!  You better believe I’ll be making another one after Christmas to ring in the New Year!

So what do you think?  Can you think of other cute ideas for wreaths?  Maybe you have a secret hatred for wreath making?  Don’t be a humbug!  Break out that creativity and fashion up a wreath just to your liking, you can always throw it out after Christmas if you want, LOL.  As always, thanks for checking us out and stay tuned for more crafty Christmas projects to come!

“Another” Advent Calendar!

WE’VE MOVED!WE'RE MOVING!

Check out this post and other crafty inspiration over at our new blog!

www.mypapercraze.com


Good Morning and Happy Friday!  As Christmas gets closer, the days just seem to fly by, don’t they?  Between shopping and decorating, gift wrapping, cooking, and even more shopping, it’s a constant count down to the “big day”.  But don’t let the daily rush drag you down!  Christmas is more than one day, it’s a whole season of joy and cheer!  I really enjoy all things that add to the excitement of the season, especially when there are little ones in the house.  This is just one more way of building up to the big day!  I’ve been seeing Advent Calendars everywhere these days but I wanted to share this one with you that’s just a little bit different… in a good way!

It all started with an old frame I found in a closet (that happens to everyone, right?).  Add in a can of red spray paint and a little sandpaper for distressing and it was good to go.  Next up, I made a burlap poinsettia.  (I know, two holiday favorites together!)  It consists of nothing more than cutting leaf shapes out of burlap, adding red glitter glue to the edges, and a floral pick.  I hot glued all the pieces onto a circle shape cut out of burlap and hot glued it to the frame (can you tell hot glue is my best friend these days?!).   For a final though, the clothespins holding the pockets are clipped onto jute twine with the twine attached to the back of the frame.

12-71ED3394-721458-960

 12-5283DE08-617665-960

Photo 2 (2)2

Photo 1 (3)

I know you’re thinking… so what’s different about this one?  I’m getting there, so stop rushing me!  😉  For the pockets, I actually used a December daily file by Lori Whitlock I found on the Silhouette Online Store.  Inside each pocket, I inserted a card with a “hint” on somewhere in the house that I have hidden a goodie!  So each day, they have a new “hint” and a new goodie to find!   How fun is that!  The hints can be simple or more challenging depending on the age of the child.  On at least one occasion, our Elf on the Shelf, Jingle, was caught trying to peek in one of the pockets.  Needless to say, that sent the household into a tizzy!  I’ll have to share some of Jingle’s antics later, he’s one mischievous little elf.

Photo 1 (10)

I hope you enjoyed this version of “Another” Advent Calendar!  Don’t worry if you’ve gotten behind with all the hustle and bustle of the season, go ahead and start one now!  They really are a lot of fun and the kids don’t care if it’s 25 days or just 12 (or 3?  LOL).  Seeing the excitement in their eyes makes it all worthwhile.  As I’m soon realizing, these days of sweet innocence don’t last forever, so take advantage of it while you can!

Speaking of sweet and innocent, Sunday’s post is an absolute MUST READ for anyone with children, grandchildren, neighbors… heck, even just friends, LOL.  I have a list of my favorite Christmas Cheer resources to pass along!  Stay tuned!

Sharing with:

Guest Hosting Link’n Blogs #3 Party  http://learningcreatingliving.blogspot.com/2013/12/guest-hosting-linkn-blogs-3-party.html

Catch a Glimpse Party #161  http://www.aglimpseinsideblog.com/2013/12/catch-glimpse-party-161.html

Artsy Corner Link Party http://www.artsyfartsymama.com/2013/12/artsy-corner-link-party-2.html

2 Creative Chicks Challenge #9 Christmas/Winter Extra Posting  http://www.2creativechicks.com/2013/12/challenge-9-christmaswinter-extra.html

Holiday Decor Link-up  http://rainonatinroof.com/2013/12/holiday-decor-link/

The Party Bunch Link Party #8  http://whipperberry.com/2013/12/the-party-bunch-link-party-no-8.html?utm_source=feedburner&utm_medium=email&utm_campaign=Feed%3A+Whipperberry+%28WhipperBerry%29&utm_content=Yahoo%21+Mail

The Creative Connection #23  http://www.waittilyourfathergetshome.com/2013/12/12/creative-connection-23/

It’s beginning to look a lot like Christmas…

WE’VE MOVED!WE'RE MOVING!

Check out this post and other crafty inspiration over at our new blog!

www.mypapercraze.com


That’s right!  You can see the Christmas spirit all around my house (yippie!).  With Christmas right around the corner, we decided the crank up the Christmas tunes, bring out the good ole tree and get to decorating!  This year I have been in LOVE with chevron and burlap, so what better time to combine them than Christmas?  I can’t take credit for all my decorations, but I can point you in the right direction!  All the lovely ladies I work with are absolutely fabulous and should definitely be on your list for next year (or this year, it might not be too late!).

{the wreath}

It all began with the wreath, lol.  A lovely friend of mine, owner of Snazzie Frills, always has amazing wreaths.  When she posted this one, I knew it was love at first sight!  This very wreath is what started my chevron and burlap themed Christmas, and of course I had to get the matching banner, too!  Love them both.  The banner is made using that awesome new chalkboard fabric, so you can write a little Christmas message right on your banner and change it every day if you want!  That’s too much work for me, but wonderful idea all the same!  Stop by her page and show her some love, you won’t be disappointed!

20131208_221330_resized2

20131209_231222_resized2

20131209_231241_resized

{the tree}

Now I’ll admit, I was a bit horrified when I plugged in my tree this year and :: bam :: multicolored lights are shining bright.  I had completely forgotten (no offense if you like multicolored lights, they’re just not my thing).  So, since I have such a wonderful husband, he dashed out to the store to pick me up some white globe lights and saved the day!  So, yes, my tree has white lights, just like I always wanted, lol.

1477704_10202658475326278_2080201310_n

I was fortunate to stumble across a fabulous local business by the name of Cherry Barn Originals that hooked me up with a fabulous tree skirt in burlap and chevron.  (she also does fabulous clothing, check her out!).


Isn’t it just amazing?!?  I am just in awe every time I look at it.  She also hooked me up with matching stockings for the family, but we’ll get to that in a moment.  So with this fabulous tree skirt, the pressure was on for me to really do it up good for the tree… so what better than matching tree streamers?  Check them out, I was quite impressed with myself…


20131208_214631_resized_1     20131208_214647_resized

I’ll let you in on a little secret… I actually recycled the burlap chair sashes I had for Thanksgiving!  It may be difficult to see, but I have a layer of bunched burlap on the bottom and red chevron ribbon on the top.  Together, they look awesome with the red ornaments to set them off.  I just bunched up a burlap bow on top and ta-da.

{the stockings}

I was really torn over my stockings this year because… WE DIDN”T HAVE ANY!  What kind of mother doesn’t have stockings for her family?  Well, this is our first Christmas as a family, so I guess I will cut myself some slack, but geez, I was horrified (again!).  It’s been a traumatic series of events here, lol.  But now, with this fabulous tree skirt on the way, I just HAVE to have matching stockings!  Luckily, my girl Jennifer (Cherry Barn Originals) hooked me up (again!) with coordinating stockings!  They are all different, but the same, you know?  I call them awesome!  We also have a sweet little Baby’s First Christmas stocking snuggled right in the middle.  Best. Stockings. Ever.

 20131208_215608_resized2

20131208_215626_resized

I didn’t want burlap actually on the stockings.  The only thing consistent about my decorating is that it always changes.  So instead, I just tucked some burlap in there with my stocking hangers and I love how it turned out.  So simple.  As you can see, we decided to hang ours on the window sill this year, right next to our tree.  They look so cute together.

{the snowman}

This next idea was shared to me by a good friend I work with and it was just too cute not to steal!  Now, the original snowman idea was made with a full-sized tree, but I decided to go with a little skinny-mini tree so that it would fit in my dining room and am SO happy with how it turned out!  The eyes, mouth and buttons are all made out of coal (aka Christmas ornaments), the scarf is chevron ribbon, the hat was pre-made in the children’s Christmas craft area, the carrot nose is rolled up orange cardstock and the arms are recycled twigs from my Give Thanks tree from Thanksgiving!  It was super easy and is now my kid’s favorite tree in the house, lol.

20131208_221309_resized     20131208_221253_resized

{the countdown}

And last but not least, what Christmas décor is complete without a Countdown to Christmas?  This project is another recycle from Thanksgiving!  I used that wonderful chalkboard paint (the spray can variety), covered a piece of poster board with it, slapped it in the frame and called it done.  For this project, I added a little burlap, changed up the message and it’s a great addition to our home.  The kid’s think it’s really fun, too — between the countdown and the snowman, this is their favorite corner of the house, lol.

20131209_231156_resized

20131209_231107_resized

20131209_231128_resized

So are we ready for Christmas or what?  I love the fact that just walking through my house lifts my Christmas spirit!  I can’t wait to get back on Pinterest and find some more great ideas to add to our home.  Who says Christmas is only for kids?  Not me, but I do try to include them in everything I can.  They’re not much for decorating, but they’ll sing Christmas songs and eat cookies with me, and that’s what I call good company.  That’s what I love about each and every one of these projects… they may not be magazine worthy or be featured on blogs around the world, but I have real projects for real people and families.  Let’s face it, with kids in the house, it’s hard to get anything done, much less a perfect Christmas mantel.  I don’t even have a mantel, lol.

Thanks for joining us again today, we’ll have more Christmas fun for you right around the corner.  Remember, only 15 days left until the big day!

Shared with:

Take It On Tuesday #102  http://romanceonadime.com/take-it-on-tuesday/take-tuesday-blog-hop-102/

DIY Fringed Burlap Christmas Tree

WE’VE MOVED!WE'RE MOVING!

Check out this post and other crafty inspiration over at our new blog!

www.mypapercraze.com


Good Afternoon and TGIF!  As promised, we are starting out CHRISTMAS projects — whoot whoot!  Today we bring you a fun and simple craft… a Fringed Burlap Christmas Tree!  If you like burlap half as much as I do, you will like these little trees, I promise!Photo 1 (8)As most of you know, burlap is so popular right now and I love the look it gives home decor items.  One of the best things about it’s popularity is that it comes in SO may colors and patterns!  For Christmas, I chose to go with this beautiful bright red.  This little tree is so cute and goes perfect with my or soon to be Christmas décor!  You’ll definitely see burlap as a trend in my house this season.

Supplies:

Burlap in your color choice, 1/4 yard

Hot glue gun (and glue sticks)

Cone (I used a green styrofoam one)

Scissors (careful, burlap can be rough on your good fabric/paper ones!)

Star for top of tree (optional)

My first step was to get a clean, straight edge on my burlap.  The easiest way I have found is to find a thread near the edge of your piece of burlap and pull it all the way out.  This gives you a line to cut and helps keep your burlap from unraveling.

Photo 1 (9)

Photo 2 (5)

Next I cut some strips.  I counted 12 threads from the edge, pulled the 12th thread all the way out and cut my strip.  I then pulled 4 threads from the edge to create the fringe.  I made a total of 4 strips that were 44″ long.  Starting at the bottom of the cone, glue the edge of the first strip.  Then wrap it all the way around and cut it to size; glued that end.  I let my fringe hang off the bottom but you could make yours flush if you prefer.Photo 3 (5)

The next piece of ribbon is attached at a slight angle so that it lays smooth as you circle it up the shape of the cone.

Photo 4 (2)

Continue wrapping up and around and around and around… and glue the end of your strip.

Photo 5 (2)Pick up with your next strip, gluing the end (of course) and keep wrapping around until you reach the top of your cone.  BEFORE you get all the way to the top, look at what type of end your cone has.  My cone had a flat top, so I cut a square piece of burlap and attached it to the top and then finished wrapping and gluing the final end.  I added a glittered star (dollar store special!) and tied a bow on it with one of the threads I pulled from the burlap (Yay recycling!).  And ta-da!

Photo 1 (8)

I left my burlap tree as is, which some (not me) may consider plain.  When you make your own, think about how you want to dress yours up.  Will you make a cute little garland wrap?  Add some ribbon?  Ornaments?  Snow?  Get some different sized cones and make a stacked set!  That’s what’s so great about these little projects, you can always add your own touch!

See?  I told you that you would love them, and aren’t they so easy?  Just try to control yourself with the burlap… once you start working with it, you’ll start thinking of how wonderful it would look all over your house!  Oh, what the heck, just go crazy with it, LOL!  Stay tuned for more Christmas goodies right around the corner and don’t forget to subscribe that email to get all our projects straight to your inbox.  It’s like unwrapping a present each time you get one (okay, not really, but still a lot of fun!).

Sharing with:

Tutorials & Tips Link Party #138  http://www.homestoriesatoz.com/tutorials/tutorials-tips-link-party-138.html

Awesome Things Tuesday http://www.sowderingabout.com/2013/12/awesome-things-tuesday_10.html

Easy-Peasy Gift Tag using Print & Cut on the Silhouette

WE’VE MOVED!WE'RE MOVING!

Check out this post and other crafty inspiration over at our new blog!

www.mypapercraze.com


Good morning and Happy Hump Day!  I’m here today to share a quick post on my first Christmas project of the season.  I was lucky enough to get in on a tag swap with a very fun and talented group of crafters.  The instructions were to make any type of tag but I decided to get a jump start on the holiday and go with a Christmas gift tag.  I needed to make 21 tags so to keep it simple, I went with the print & cut feature on my Silhouette instead of cutting each piece separately.   That’s what I call easy-peasy.

Photo 1 (3)

I started with a simple tag cut out of kraft cardstock and then added my red ribbon at the top tied with jute string and a faux bow on the side.  Just to add some interest, I layered my sentiment on top of a piece of burlap.  The sentiment and the tree came from the Silhouette Online Store.  I filled them with color and patterns and then used the offset feature to create a white border.  I cut my star out of white glittered cardstock  and used foam squares under the tree to add some dimension.  Finally, I added some glossy accents to the holly berries.  It just doesn’t get any easier than this.  I hope this inspires you to get started on your holiday projects and be sure to come back and see the other projects we have planned.

Sharing this with:

Christmas Gift Tag Link Party  http://chickenscratchny.com/2013/12/christmas-gift-tag-link-party.html

Craft It Up & Link It Up Linky Party #20  http://www.craftindesertdivas.com/search/label/Linky%20Party