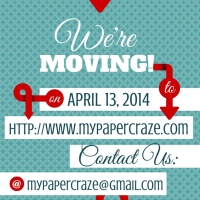
Monthly Archives: April 2014

Easter Peeps Treats with {FREE} Printables and Cut File

WE’VE MOVED!WE'RE MOVING!

Check out this post and other crafty inspiration over at our new blog!

www.mypapercraze.com


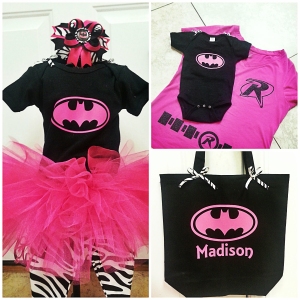
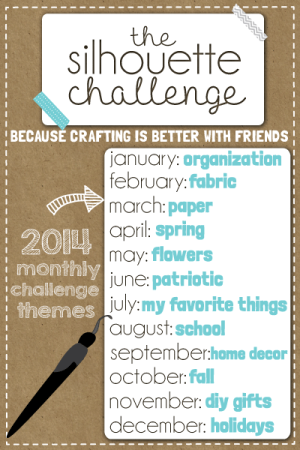
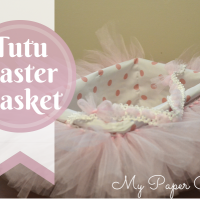
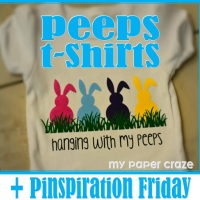
Hello friends! Today is another great opportunity to participate in our Silhouette Challenge Group’s Monthly Challenge!  Yippee! TheSilhouetteChallenge-TTC&Friends As you may have guessed, we’re continuing our little series on Easter crafts.  You’ve seen our DIY Easter Peeps T-Shirt, our DIY Tutu Easter Basket and our Easter Bunny Banner!  You know how much we love our {PEEPS}, so for our project, we’re offering an Easter Peeps Treats with a {FREE} Printable AND Cut File!

Easter Peeps Treat with Free Printable and Cut File by My Paper Craze

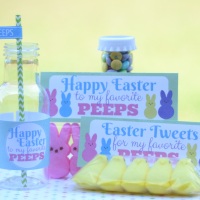
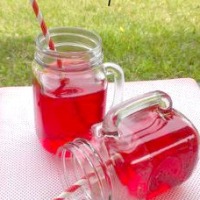
Aren’t they the sweetest? These would be super cute to hand out on Easter!  Not only do we have these awesome treat bag toppers for your {PEEPS}, but we have the printable wrapper for your bottle and the printable tag for your straw!  How exciting!

Easter Peeps Treat with Free Printable and Cut File by My Paper Craze 5

As promised, we do have a {FREE} printable and cut file for you!

EASTER PEEPS TREAT PRINTABLE

EASTER PEEPS TREAT  TOPPER #1 CUT FILE (Silhouette Print & Cut)

EASTER PEEPS TREAT  TOPPER #2 CUT FILE (Silhouette Print & Cut)

EASTER PEEPS STRAW FLAG CUT FILE (Silhouette Print & Cut)

EASTER PEEPS BOTTLE WRAPPER #1 CUT FILE (Silhouette Print & Cut)

EASTER PEEPS BOTTLE WRAPPER #2 CUT FILE (Silhouette Print & Cut)

EASTER PEEPS BOTTLE WRAPPER #3 CUT FILE (Silhouette Print & Cut)


Want to Check Out More Silhouette Projects?

My Silhouette Challenge buddies and I are all sharing projects on our blogs today, so peruse the projects below for a wealth of Silhouette inspiration!

Spring Cleaning - Custom Canisters I Love Paris In the Springtime Etching for Sping - Mug Personalization for the April Silhouette Challenge WHEELY excited about spring No-Sew Fabric & Burlap Peter Cottontail Banner Narwhals, plus friends Gold Fern Easter Eggs Mr and Mrs Easter Egg Head Easter Bunny Plate Welcome Spring - A Sign From Tile Paper Flowers Wall Art DIY: Bunny-Stamped Goodie Bags for Easter Inspirational Window Now We Have Everything Nursery Art Spring' and Flowers Paper Banner Glitter Jars with a Happy, Hoppy Bunny Made with the Silhouette + Free Cut File! Mother's Day Wreath Decorate A Watering Can With Vinyl! April Showers Sketch Pen Printable Spring Wreath Burlap Garden Flag with Heat Transfer Vinyl Pretty Little Herb Pots Peter Cottontail Door Hanger Spring Has Sprung Spring Has Sprung - Subway Art Bloom And Grow Sunflower Bouquet for Teacher Appreciation Sharpie Easter Eggs Tear Open Easter Egg Cards Look what's Blooming! ~ Silhouette Challenge Everblooming Paper Bouquet Silhouette Challenge: Spring Polish Swap Card [B] is for Bloom: Scrap Lumber Flower Vases Tulip Time - Fridge Magnets Neon Paper Pinwheels {tutorial} A Happy Spring Card Sketching Just Got Easier! Spring Bunny Baskets Bird Nerd Easter Eggs Easter Peeps Treats with {FREE} Printables and Cut File Garden Bench Update

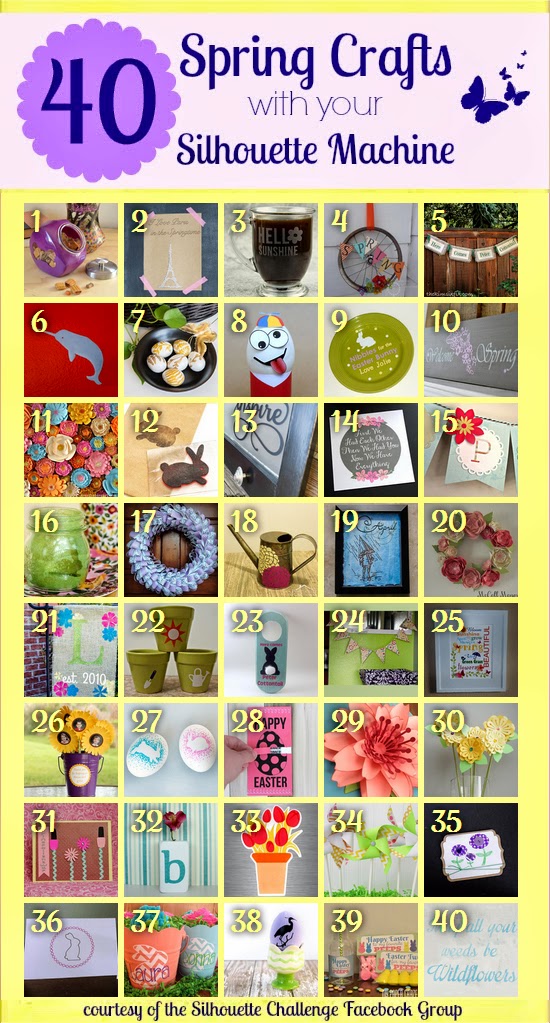
1. Dream a Little Bigger // 2. So Much Better With Age // 3. Adventures in All Things Food // 4. Creative Carnival // 5. The Kim Six Fix // 6. feto soap // 7. One Dog Woof // 8. The Experimental Home // 9. From Wine to Whine // 10. Architecture of a Mom // 11. Grey Luster Girl // 12. Minted Strawberry // 13. Designed Decor // 14. Tried & True // 15. Silhouette School // 16. Bringing Creativity 2 Life // 17. Weekend Craft // 18. Practically Functional // 19. Please Excuse My Craftermath… // 20. McCall Manor // 21. unOriginal Mom // 22. Creative Ramblings // 23. A Tossed Salad Life // 24. A Glimpse Into Barb’s Life // 25. Kate’s Paper Creations // 26. Simply Kelly Designs // 27. Cutesy Crafts // 28. Persia Lou // 29. Whats Next Ma // 30. Two Purple Couches // 31. The Frill of Life // 32. Nearly Handmade // 33. Get Silvered // 34. Ginger Snap Crafts // 35. Life After Laundry // 36. The Sensory Emporium // 37. Monograms & Cake // 38. The Thinking Closet // 39. My Paper Craze // 40. Chicken Scratch NY

Easter Bunny Banner + Pinspiration Friday

WE’VE MOVED!WE'RE MOVING!

Check out this post and other crafty inspiration over at our new blog!

www.mypapercraze.com


Oooo, have I told you how much we love Pinterest lately?  It seems like every time I jump on there, I find a whole new world of inspiration and a whole new crafting to-do list!  Today, we did a bright and beautiful Easter Bunny Banner!  But first, you can also view this post at our NEW site!  Hop on over!

Easter Bunny Banner + Pinspiration Friday by My Paper Craze

From our {PINSPIRATION} list, we’ve done Hanging With My {PEEPS} T-Shirts and a Tutu Easter Basket, so let’s switch over to our handy-dandy Silhouette machine for a little paper crafting!

I created this colorful Easter banner for a friend of mine and it was {OH} so much fun to design!

First, find a few Easter egg cut files in the Silhouette Online Store.  And you know me, always looking for a deal!  If you look close, you will find a few files that include THREE egg designs instead of just ONE!

Second, locate the bunnies of your choice.  Again, I downloaded mine from the Silhouette Online Store (did I mention they are having a great sale on their Easter files?).

Easter Bunny Banner + Pinspiration Friday by My Paper Craze

Once you decide on the size of your banner, start cutting those eggs out, one by one.  Make sure you cut them all the same size (or close to it).  The back layer is a solid egg shape with no design.  If you don’t want to download it, simply use the offset feature in the Silhouette Studio and shrink it down to an exact fit.  You’ll glue the white background to the color egg design.

Next, you’ll cut out your lettering in a contrasting color.  I chose white, then outlined the very edge of my cardstock with a purple sharpie for definition.

Easter Bunny Banner + Pinspiration Friday by My Paper Craze

Once all of your eggs are assembled with the layers and lettering, think about putting a few embellishments on there for an extra special look.  I picked up some spring chipboard embellishments from the Dollar Tree, they’ve been in my stash for over a year, just dying to be used!

Easter Bunny Banner + Pinspiration Friday by My Paper Craze

The two final steps are to punch holes in the desired locations and string some twine or ribbon through!  I chose the top of the eggs and bunny ears so they would all hang down in a row.  It’s also a little more difficult to align the hole punches on the sides, just something to keep in mind.

Easter Bunny Banner + Pinspiration Friday by My Paper Craze

Don’t you just love all these bright colors?  Hop on over to our {Easter Crafts} board for more {PINSPIRATION} than you can stand!!  I’m sure you’ll find tons of projects to squeeze in before the Easter Bunny comes!

We’re Moving!

As all fun journeys do, we’ve run into a much needed change, so… WE’RE MOVING!

WE'RE MOVING!

So how does this effect you? All us to explain…

IF YOU SUBSCRIBE TO OUR POSTS VIA EMAIL:
This change won’t effect you at all! We set up a site redirect and all of our lovely subscribers will move over with us! Hooray!

IF YOU ARE A WORDPRESS USER AND SUBSCRIBE TO US VIA WORDPRESS.COM:
This notice is for you! Since we are moving to a self-hosted site, WordPress isn’t able to notify you of our new posts anymore. BUT don’t despair! Just jump on over to our new site and subscribe to our email posts, then all will be well! Check out the new and improved and slightly the same My Paper Craze!

We’ll still have all the great social media links that you’ve come to know and love:

Follow My Paper Craze on Facebook! Follow Becky @ My Paper Craze on Pinterest! Check out My Paper Craze's Etsy Shop Follow My Paper Craze on Bloglovin' Follow Glenna @ My Paper Craze on Twitter! Check out My Paper Craze on StumbleUpon! Follow Glenna @ My Paper Craze on Google+! Follow Becky @ My Paper Craze on Instagram! Send us an Email! Image Map

AND, you can still email us at mypapercraze@gmail.com!

See, no reason to panic!  We’ll see you soon on the new site!

Five Kid Tested Egg Decorating Techniques… Pass or Fail?

WE’VE MOVED!WE'RE MOVING!

Check out this post and other crafty inspiration over at our new blog!

www.mypapercraze.com


Every holiday, we try to make time to do a special craft with the kids.  They love it, we live through it, and we all build great memories together.  Right?  Well, technically.  See… I really do love crafting with my kids.  I used to look forward to when they would get old enough to be calm and patient and create beautiful masterpieces alongside of me.  Well, evidently we are not there yet!  So to save you some pain and headache before Easter, here are Five Kid Tested Egg Decorating Techniques… Pass or Fail?

Five Kid Tested Egg DIY Decorating Techniques by My Paper Craze

We gathered up some supplies that we had laying around the house thinking, “It can’t be that hard, they look so {EASY} online…  and technically they are.  It’s all about capturing the attention of your younger audience.  Here are the five techniques we tried:

  • Creating rubber band lines
  • Traditional egg dying
  • Decorating with tattoos
  • Decorating with glue and glitter
  • Cool Whip dye

So out of the five techniques above, which ones do you vote for to be kid approved?  Let’s find out!

Five Kid Tested Egg DIY Decorating Techniques by My Paper Craze

Traditional egg dying was, surprisingly, a {FAIL}.  We chose to decorate artificial eggs this year, as the kids were sssoooo disappointed that we weren’t going to hide their hard-boiled eggs last year {I sure didn’t want to smell the lost eggs a year later!}.  Unfortunately, artificial eggs, as great as they may sound, don’t hold traditional dye as well.  The information on the package simply states that dying will result in pastel colors… but they mean VERY pastel.  {AND} THEY FLOAT.  I know, I should have seen this coming, but really?  How do you die floating eggs?  The kids were tired of holding them down with spoons, so we fetched glasses out of the cabinet and placed them on top.  Needless to say, after about thirty seconds, the kids were ready to move on to something else.  Dying these eggs were the equivalent of watching the grass grow.  Snooze.

Five Kid Tested Egg DIY Decorating Techniques by My Paper Craze

Another method we have seen is using rubber bands around the eggs to create lines when dyed.  Now, this may have turned out better had the dye not been an extremely light shade of pastel.  Unfortunately, with pastel egg dye, this turned into another {FAIL}.

Five Kid Tested Egg DIY Decorating Techniques by My Paper Craze

Glitter + Glue + Kids = {FAIL}.  Again, this is another great concept if you have older children.  As it turned out, we had glitter and glue all over the table, all over us, and basically everywhere except for the eggs.  We also tried to add some glitter to a bag, drop the egg in and shake it.  The glue on the egg stuck to the side of the bag and resulted in a glitter clump.  {Sigh} The kids might have had a little fun, but our constant “stop” “don’t do that” “give it here” weren’t exactly the ideal feedback.  We ended this lesson and moved on.

Five Kid Tested Egg DIY Decorating Techniques by My Paper Craze

Kids love tattoos.  I don’t think I’ve ever met anyone who didn’t love temporary tattoos as a child.  In theory, this is another method that COULD work.  If your kids never touched the eggs again.  Well, that might be exaggerating a little, but the tattoos do rub right off the eggs.  And because the kids love them so much, they just can’t seem to put them down, resulting in little tiny balls of tattoo paper on the table and blank white eggs.  Back to square one.

Five Kid Tested Egg DIY Decorating Techniques by My Paper Craze

Finally!  We found one that is 100% kid tested and APPROVED!  This was a big hit for one main reason… can you guess why?

Five Kid Tested Egg DIY Decorating Techniques by My Paper CrazeThey were obsessed with eating the Cool Whip, {LOL}.  We finally gave in, AFTER we decorated a few eggs.  So what’s the secret to using Cool Whip to dye your Easter eggs?

  1. Grab a plate and spread a layer of Cool Whip
  2. Using GEL food coloring, mix in each color in a small area (we used tooth picks)
    Five Kid Tested Egg DIY Decorating Techniques by My Paper CrazeFive Kid Tested Egg DIY Decorating Techniques by My Paper Craze
  3. Once you have several colors (or just one, if you prefer), intertwine your colors togetherFive Kid Tested Egg DIY Decorating Techniques by My Paper Craze
  4. DO NOT MIX YOUR COOL WHIP – it will blend the colors into oneFive Kid Tested Egg DIY Decorating Techniques by My Paper Craze
  5. ROLL your egg {DO NOT SLIDE OR SCOOT} – we used a spoonFive Kid Tested Egg DIY Decorating Techniques by My Paper CrazeFive Kid Tested Egg DIY Decorating Techniques by My Paper Craze
  6. Here is your finished product.  You can dab off the excess Cool Whip with a paper towelFive Kid Tested Egg DIY Decorating Techniques by My Paper Craze

So what’s on your agenda for egg decorating?  Do you have any tips to share on tried-and-true decorating methods?  I’d like to say all of this experimenting was a lot of fun, but I truly think next year we are going with the store-bought kits that have stickers and all.  {GASP}  I know.  But after all this “excitement”, I just needed a nap {LOL}!


How To Make Your Own 3D Dots!

WE’VE MOVED!WE'RE MOVING!

Check out this post and other crafty inspiration over at our new blog!

www.mypapercraze.com


Well {HELLO THERE} you amazing reader!  Thanks for stopping by, hopefully we have a pretty amazing trick to show you today.  A few weeks ago I was making some super cute mermaid themed party invitations that needed a special touch.  After cutting the various pieces and looking at the design, I realized that including a 3D element would really add that extra pop… but of course I didn’t have any in my supplies!  Or did I?… How To Make Your Own 3D Dots

So just like all of my fellow crafters, I love adding special touches to my crafts.  {BUT} sometimes the price factor makes you stop and think “Am I going overboard with my embellishments?”  That’s the whole reason I purchased my Silhouette Cameo to begin with, so I can cut my own shapes and make my own embellishments for my crafts.  Now 3D dots (or foam squares) aren’t going to break the bank… but from the words of a very wise man “A penny saved is a penny earned!”

So back to my beautiful mermaid themed invitations and the dilemma of the missing 3D dots.  What was I going to do?  As I am drumming my fingers on my kitchen countertop, I start to pick at some hot glue that had dripped from my glue gun (it’s not like I should use a mat or anything!) and it hit me… I could squeeze a little hot glue onto my seahorses and let it dry!  And an idea was born!

So I assembled the layers of my seahorses and flopped them over to expose their backside.  Two drops of glue later and {TADA}…

DSC_0052

I know, it sounds too easy, right?  Well, for once, it is!  Just let them dry and you are good to go!  I used high temp hot glue and created these even little bubbles that offered a little depth.  I image you can also use low temp hot glue, it just might be a little more difficult to create even bubbles since the glue wouldn’t be as viscous.  Once the hot glue was cool, I then applied another small dab of hot glue and adhered my seahorses to my invitations.  How did they turn out?  Take a look for yourself…

collage

I was thrilled with how these turned out!  Another great reason that I love my Silhouette!  I was able to create the entire invitation using the Print & Cut feature!  Interested in a tutorial with a free cut file?  Leave a comment below and I’ll add it to the project list!  We love your feedback, so keep it coming!

Mermaid seahorse invitations from My Paper Craze

DIY Tutu Easter Basket + Pinspiration Friday

WE’VE MOVED!WE'RE MOVING!

Check out this post and other crafty inspiration over at our new blog!

www.mypapercraze.com


Hello there and welcome back to another Pinspiration Friday!  As we inch closer to Easter, we’re loving all these awesome Easter crafts we’re finding and can’t wait to share the fun with you!  Last week we visited our {PEEPS} with our cute Hanging With My Peeps T-shirt.  This week, we’ll make a matching accessory… a DIY TUTU EASTER BASKET!  Whoo-hoo!

DIY Tutu Easter Basket by My Paper Craze

As you might have guessed, we love tutus and they are so easy to make!  This Easter basket makes for an extra special accessory to give to your little hunny-bunny on Easter… a wearable tutu!

Start off by grabbing some supplies at your local craft store.  We like Hobby Lobby, they had an amazing sale for us to pick up this adorable polka-dot basket and dress it up with our tulle.  Here’s what you’ll need:

  • 1 basket – you can choose on from the Easter aisle or re-purpose one from home
  • 2 rolls of color coordinated tulle – depending on your basket and how full you want your tutu
  • Ribbon, elastic band or elastic headband spool

DIY Tutu Easter Basket by My Paper Craze

After you grab your supplies, do you remember how to make a quick and easy tutu?  Jump on over to our tutu post Pretty In Pink.  We had a great time making tutus for Breast Cancer Awareness month back in October!  This post has the link for a full video tutorial from Just Add A Bow that makes it so easy to follow along.  We love our tutorials, but for this piece, a video is the safest bet.  We’ll wait while you give it a glimpse…

Got the hang of it?  So what you’ll do is grab your elastic or ribbon and measure around the TOP of your basket.  I would recommend a wooden basket over plastic, only because the elastic tends to slide off plastic surfaces.  Give it a try and see what works best for you.  Once you’ve measured and cut your desired length, go ahead and loop it around your thigh like we saw in the video.  This really is the best method from my experience.

One difference for my tutus is that I do not bunch two strips of tullle at a time.  I knew I would be doing two layers for this tutu, so I only threaded one strip of tulle through each loop, all the way around.  Once finished, I started on the second layer.  After all your layers are done (in my case, two was enough), it’s time to slip your tutu on the basket.

DIY Tutu Easter Basket by My Paper Craze

I chose to flip my basket over rather than stretch it around the top.  In truth, you can do it however is easiest for you.  Once you have it around, go ahead and flip your basket right-side up, if applicable, and pull the edge of your tutu up to the top.

DIY Tutu Easter Basket by My Paper Craze

Since I purchased a regular storage-type basket, it did not include a handle.  Don’t despair, you can just add a handle using your existing materials.  I chose to weave my tulle through the holes in my elastic headband material.  I think it turned out rather cute.  If you do have a handle attached to your basket, feel free to wrap some tulle around it to dress it up a little.

DIY Tutu Easter Basket by My Paper Craze

One of the important things about this craft, in my opinion, is to make sure that your tutu is detachable for your little princess to wear.  I don’t know about you, but I buy a NEW Easter basket each year for my daughter, so it seems that I have a ton of them laying around!  Re-dress some of those older baskets and give them a face-life with a little tulle and a whole lot of {LOVE}!

DSC_0358

As promised, we have a whole Pinterest board dedicated to Easter crafts, including more Tutu Easter Baskets!  Check out our {Easter Crafts} board for more {PINSPIRATION} than you can stand!  Put your crafty self to work, then come back and share your projects with us!  We’d sure love to hear from you!

If you enjoyed this post, check out these other similar projects:

DIY Easter Peeps Shirt + Pinspiration Friday with My Paper Craze Batman or Batgirl themed Halloween Costume with matching tutu and heat transfer iron on by My Paper Craze